How Sediment Can Damage Your Hot Water Heater And How To Flush It From Your Tank
HOW SEDIMENT CAN DAMAGE YOUR HOT WATER HEATER AND HOW TO FLUSH IT FROM YOUR TANK

Your water heater is the most used appliance in your home, next to the refrigerator. That's why it needs periodic maintenance to keep functioning reliably; otherwise, the effects of time and usage will eventually cause your water heater to fail.
Specifically, the most important maintenance step to take with a water heater is to flush it annually. Flushing removes harmful sediments that will not only prevent your water heater from doing its job but also cause permanent damage. Below is more information on why flushing is necessary and how to perform the job at home.
HOW SEDIMENTATION CAN DAMAGE YOUR WATER HEATER
Though tap water may appear to be pure, it actually contains numerous dissolved elements. Many of these invisible substances will pass through your water heater and plumbing, but some will precipitate from the water and form tiny flecks of material inside the water heater.
Calcium and magnesium are two such elements that emerge as sediments during the heating process. Each piece of sediment is small, but together they create a substantial pile as they accumulate at the bottom of your water heater.
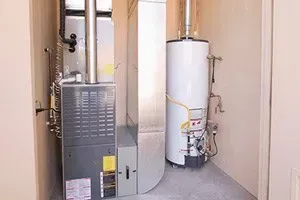
Whether your water heater is electric or gas-powered, sediments form an insulating barrier between the heat source and the water inside the tank. As a result, the water is no longer as hot as it should be, and the water heater's tank absorbs the unused heat that was intended for the water. Too much heat can damage the metal and shorten the lifespan of your water heater.
HOW TO PERFORM A HOT WATER HEATER FLUSH
The solution to sedimentation is fairly straightforward, as your water heater is equipped with a readymade device to help you eliminate excess sediment. Below is how to perform an annual flush of your water heater and remove damaging sediment accumulation.
1. Turn off the heat source of your water heater
Begin by disconnecting the electrical current to an electric water heater or turn off the gas supply valve for a gas-fired unit. Do not rely on the thermostat alone, as the water heater may accidentally turn itself on again during flushing.
2. Connect a water hose to the drain fitting
At the bottom of your water heater is a drain fitting that resembles a spigot or garden tap. Screw the female fitting of a garden hose onto the drain fitting and tighten the connection by hand. Unfurl the garden hose and route it toward a location where hot water drainage won't cause any harm.
3. Drain the water heater
Once the garden hose is connected, and it's routed to an appropriate spot, open the drain valve by turning the handle counterclockwise. Next, walk to the end of the garden hose and keep an eye on the stream of water leaving the hose. You will notice an accumulation of white, tan or gray sediment on the ground beneath the hose.
Allow the water heater to continue flushing until pieces of sediment stop appearing. Once you are satisfied that enough sediment has evacuated the tank, turn off the drain valve and disconnect the garden hose.
4. Restart the water heater
When you have removed the garden hose from the valve, reconnect the electrical current or gas supply to the water heater. Consult the instructions on relighting the water heater, which is likely located on the exterior of the tank itself, or may be found online on the manufacturer's website.
If you have questions about flushing your water heater or need to replace an aging unit, be sure to contact Superdrain for assistance. Their professionals are ready to assist you with whatever water heater needs you may have and can provide expert advice on replacement options.